

Image by Wolfgang Eckert from Pixabay
There might be affiliate links on this page, which means I get a small commission of anything you buy. As an Amazon Associate I earn from qualifying purchases. Please do your own research before making any online purchase.
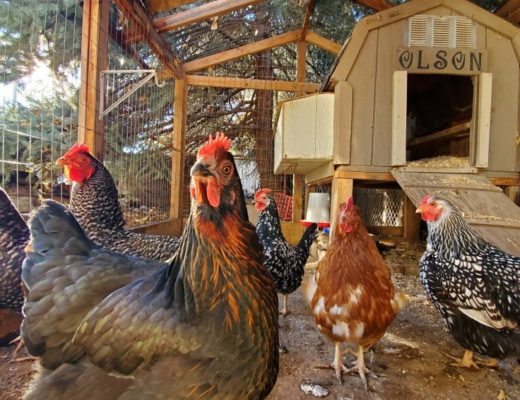
Bumblefoot. Sounds like the name of an abominable creature in a Disney movie, doesn’t it? It is a loathsome life form for sure but not a fictitious one. Bumblefoot, or plantar pododermatitis, is essentially a staph infection in the pads of chickens’ feet characterized by a pus-filled abscess often covered by a black scab. It can present with lameness, swelling, and a reluctance to walk. Of all the ailments that can hinder chickens, this one paid a visit to my coop last fall. And not to just one of my chickens, but to all six….on both feet. That’s twelve infected feet!
The discovery was made quite by accident after I had taken one of my chickens, Blueberry to the vet to have her stool examined. I had suspected coccidiosis, an intestinal parasitic disease, due to the odd color of her stool. Well, they wouldn’t observe her stool unless they completed an examination on her at which time the bumblefoot was discovered. After quoting me $300 to treat just one chicken for bumblefoot, I reached out to my partner in chicken crimes, Stacey with a panicked phone call. She assured me she could walk me through treatment, no problem. And certainly at a cost significantly less than $300! She and her kiddos promptly met me at my home at which time all three jumped into their natural roles of chicken caretakers and surgeons. It didn’t take long to discover that not just Blueberry had been inflicted with the malady but all six of my chickens on both feet as mentioned before. Stacy and her kids were amazing at catching (not always easy with my girls), treating, and then showing me how to treat this unwelcomed visitor called bumblefoot. Their experience came from treating their own chickens with the same infirmity months before. Often people will perform surgery to relieve the chickens of the infection, but Stacy showed me a more conservative approach. It was more labor intensive but effective nonetheless. Please visit this link to view a somewhat graphic surgery performed by the Chicken Chick, a well-known authority on chicken keeping. In this article I will simply be discussing my personal experience and treatment of my chickens. In no way is this to be considered expert advice. (Sidenote: Blueberry did not have coccidiosis. Her stool color was found to be within normal range).
First we confirmed that Blueberry did in fact have bumblefoot. As you can see from the video below she has the tell-tale “kernel” that signifies a staph infection in the foot pad.
We began by soaking her foot in Epsom salt and warm water to help cleanse and moisten the tissue. Next, we wrapped her in what we call a chicken burrito. This method helps her feel safe and helps keep her secure while we treat each foot.
We cleansed with rubbing alcohol to get all the dirt and debris off of the pad. (The following video is actually of a different chicken that we also diagnosed with bumblefoot).
After thoroughly cleansing the foot, we removed the loose “bumble” or any scabbing to allow the medicine to better penetrate the wound.
Using a cotton swab we applied Prid, a drawing salve to the wound as well as Neosporin and covered it with a gauze pad. I found cutting a small square of gauze and folding it in quarters makes for a nice pad and applies the right amount of pressure to the foot pad once wrapped with vet wrap. See this video on how to wrap the chicken’s foot after treatment. Have fun with your vet wrap! It comes in so many colors, your girls will look like they are sporting fun new kicks!
Thoroughly wash your hands before and after treating each chicken. Gloves may be your preference, If so, be sure to change them after treating each chicken to minimize the spread of the infection.
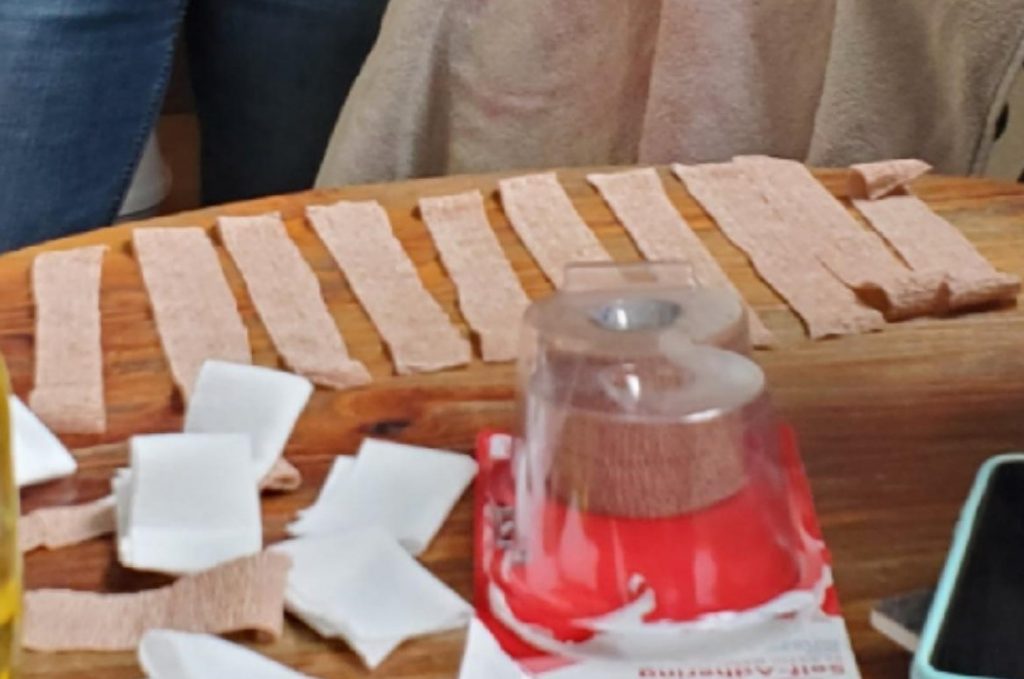
This whole process needs to be repeated every three days until bumblefoot is resolved. It is definitely a two person job, though I did perform the task on my own several times. It’s helpful to have all your tools and supplies neatly laid out and prepared to make the handling of each chicken quick and simple. Pictured here are strips of vet wrap and gauze squares that I pre-cut so they would be handy when I was ready to wrap the chicken’s foot. I cut the vet wrap to a width of about one inch and about a four-inch length. The gauze was cut into about two-inch squares, making it easy to fold them into quarters. Also near at hand (but not pictured) were the Bactine, Prid, and Neosporin I used to treat the wound.

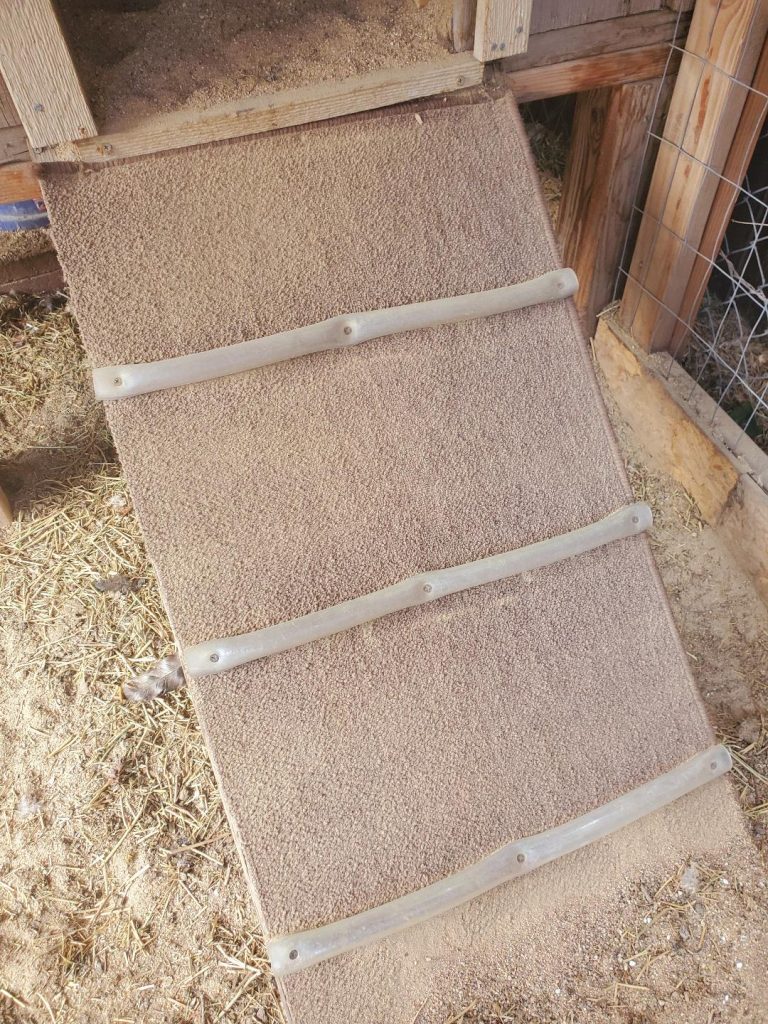
We did eventually eradicate bumblefoot from our flock and took the measures necessary to prevent incidence. Knowing the common causes of the affliction helped us to bumblefoot-proof our coop. A split or a crack in the foot pad provides the breeding ground for bumblefoot. In order to prevent splits or cracks in the foot pad it is important that roosting bars are no higher than eighteen inches from the ground as landing from a high roost can initiate a crack or a split. We removed and/or lowered all high roosts. Smooth surfaces are necessary to prevent splits and cracks. For instance rough wood surfaces can cause cuts and even splinters. Upon inspection, we noticed that the ramp that acts as the entrance and exit to the actual coop where they roost and nest had become quite rough and splintered. Our daughter came up with the idea to carpet the surface. We did just that. We also replaced the wood slats that acted as “speed bumps” on the ramp with plastic tubing. That way the girls’ feet would not come in contact with any slivered surfaces. We ensured that their roost inside the coop is smooth and flat (a 2 x 4) and not too high from the floor.

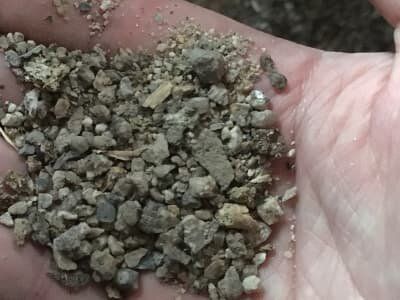
Next, we replaced the pine shavings inside the coop with washed construction sand. After doing a fair amount of research, I found that sand is the preferred bedding for inside the coop as well as the outdoor run. There are many benefits to using sand in your coop. It desiccates feces helping to eliminate moisture, it doesn’t retain moisture, it reduces frostbite risk, it doesn’t decay, it is eco friendly, acts as natural grit, provides lovely dust baths, it is very easy to keep clean and maintain (I just use a metal cat litter scoop to clean it), it’s inexpensive, and the list goes on. Feel free to read this more detailed article on using sand in the coop for more information. Keep in mind all sand is not created equal. Play sand is not recommended, nor is anything made from quartz. Washed construction sand is the preferred choice as it provides a variety of particle sizes and is not typically dusty which can cause respiratory issues for your birds.
I do recommend that you do a monthly check or so on your chickens’ feet to keep bumblefoot at bay. I am happy to report that after treating bumblefoot and making the necessary changes to my chickens’ coop and run, our girls are footloose and bumblefoot-free.

No Comments